Easy Steps to Hang a Gallery Wall:
After a year in our first home, one major thing was missing in our living room. The walls were completely bare, sans a giant wooden cutout mirror. So I thought a DIY Gallery Wall would be the best fit to fill the giant 18ft naked wall hugging the back of my sofa.
I had seen something on Pinterest years ago about creating a template that would make hanging wall art easier…. but to be honest I didn’t pay too much attention given that it was when the hubby and I were living in a tiny NY apartment, and the post didn’t seem relevant at the time.
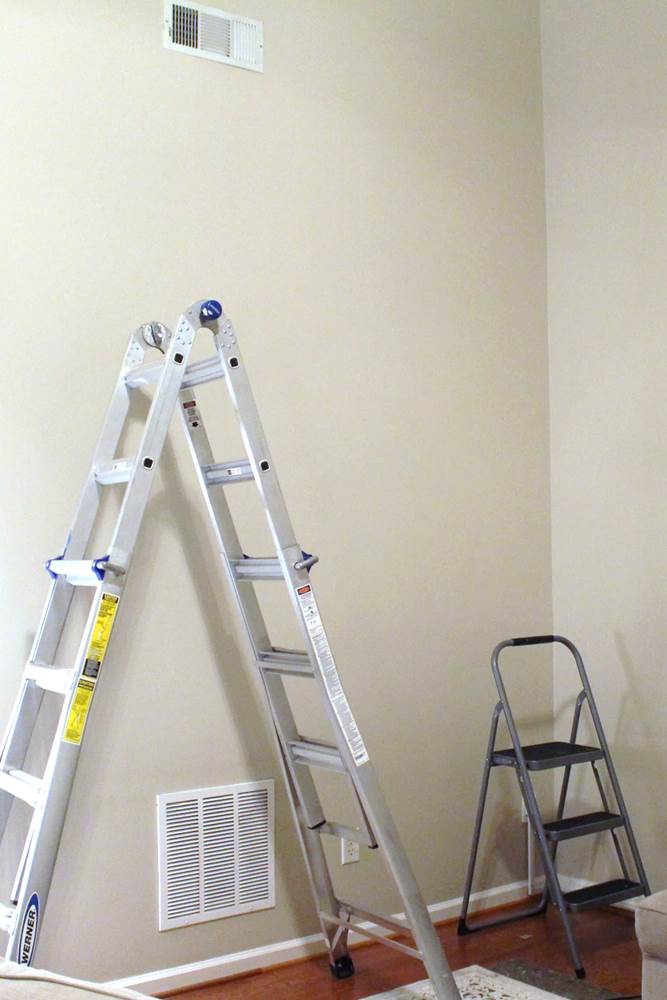
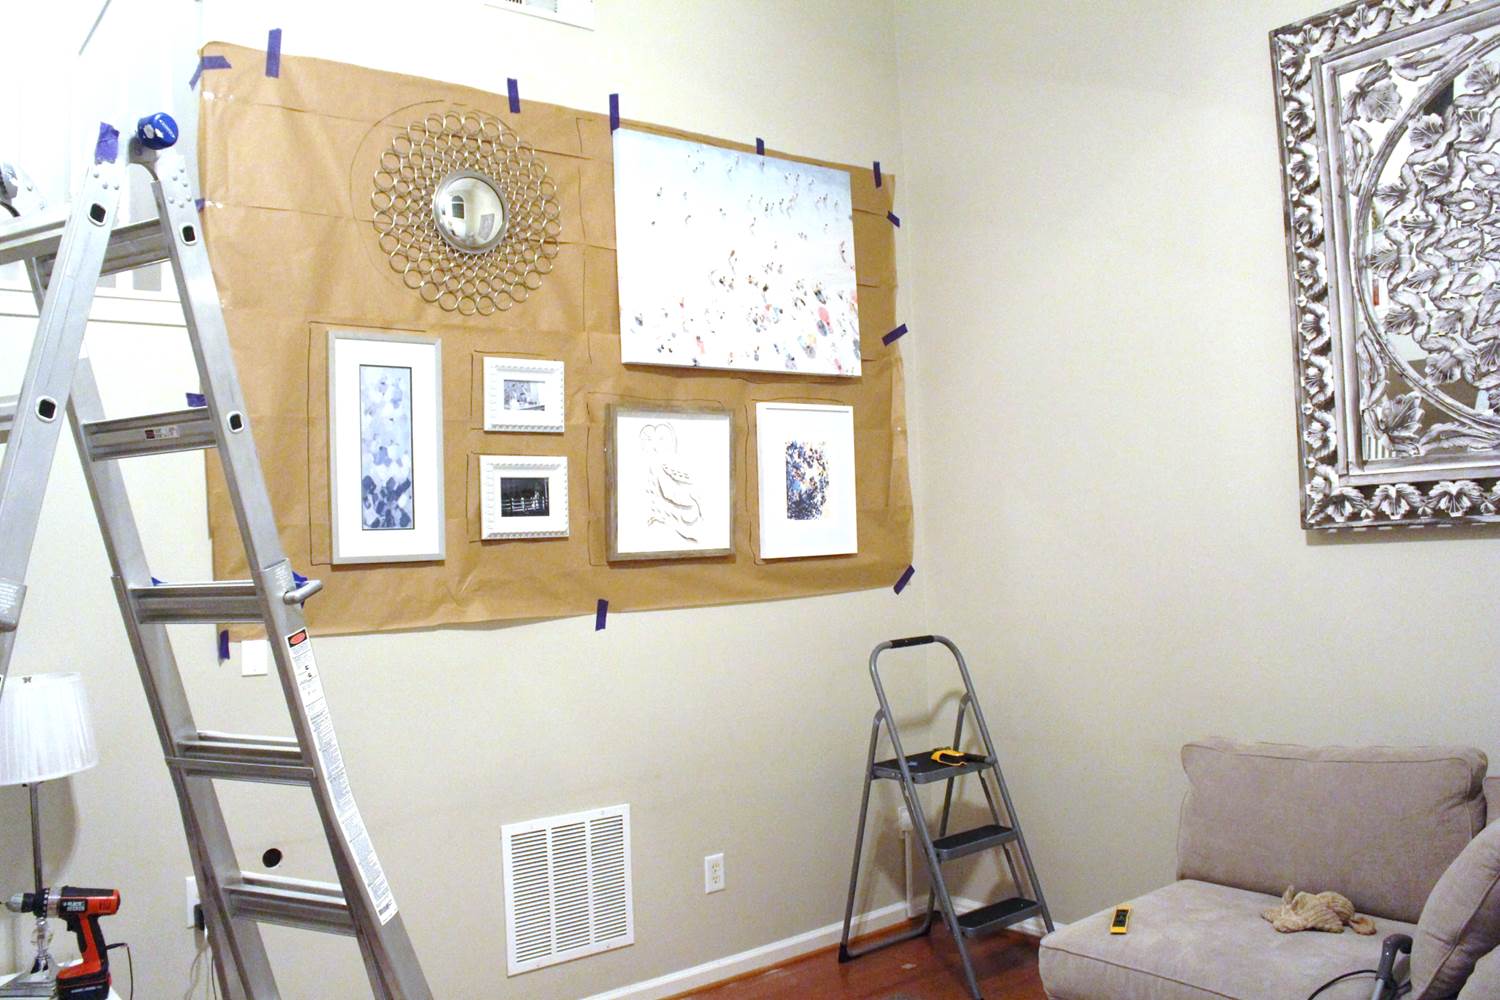
So when I started collecting the various pieces or art and images for our Gallery Wall, I knew working with such a large area might be difficult without a LOT of prep and measurment. That’s when I decided to make it a little easier on myself.
Supplies You’ll Need:
- Painter’s Tape
- Scotch Tape
- Roll of Wax Paper
- Marker
Instructions:
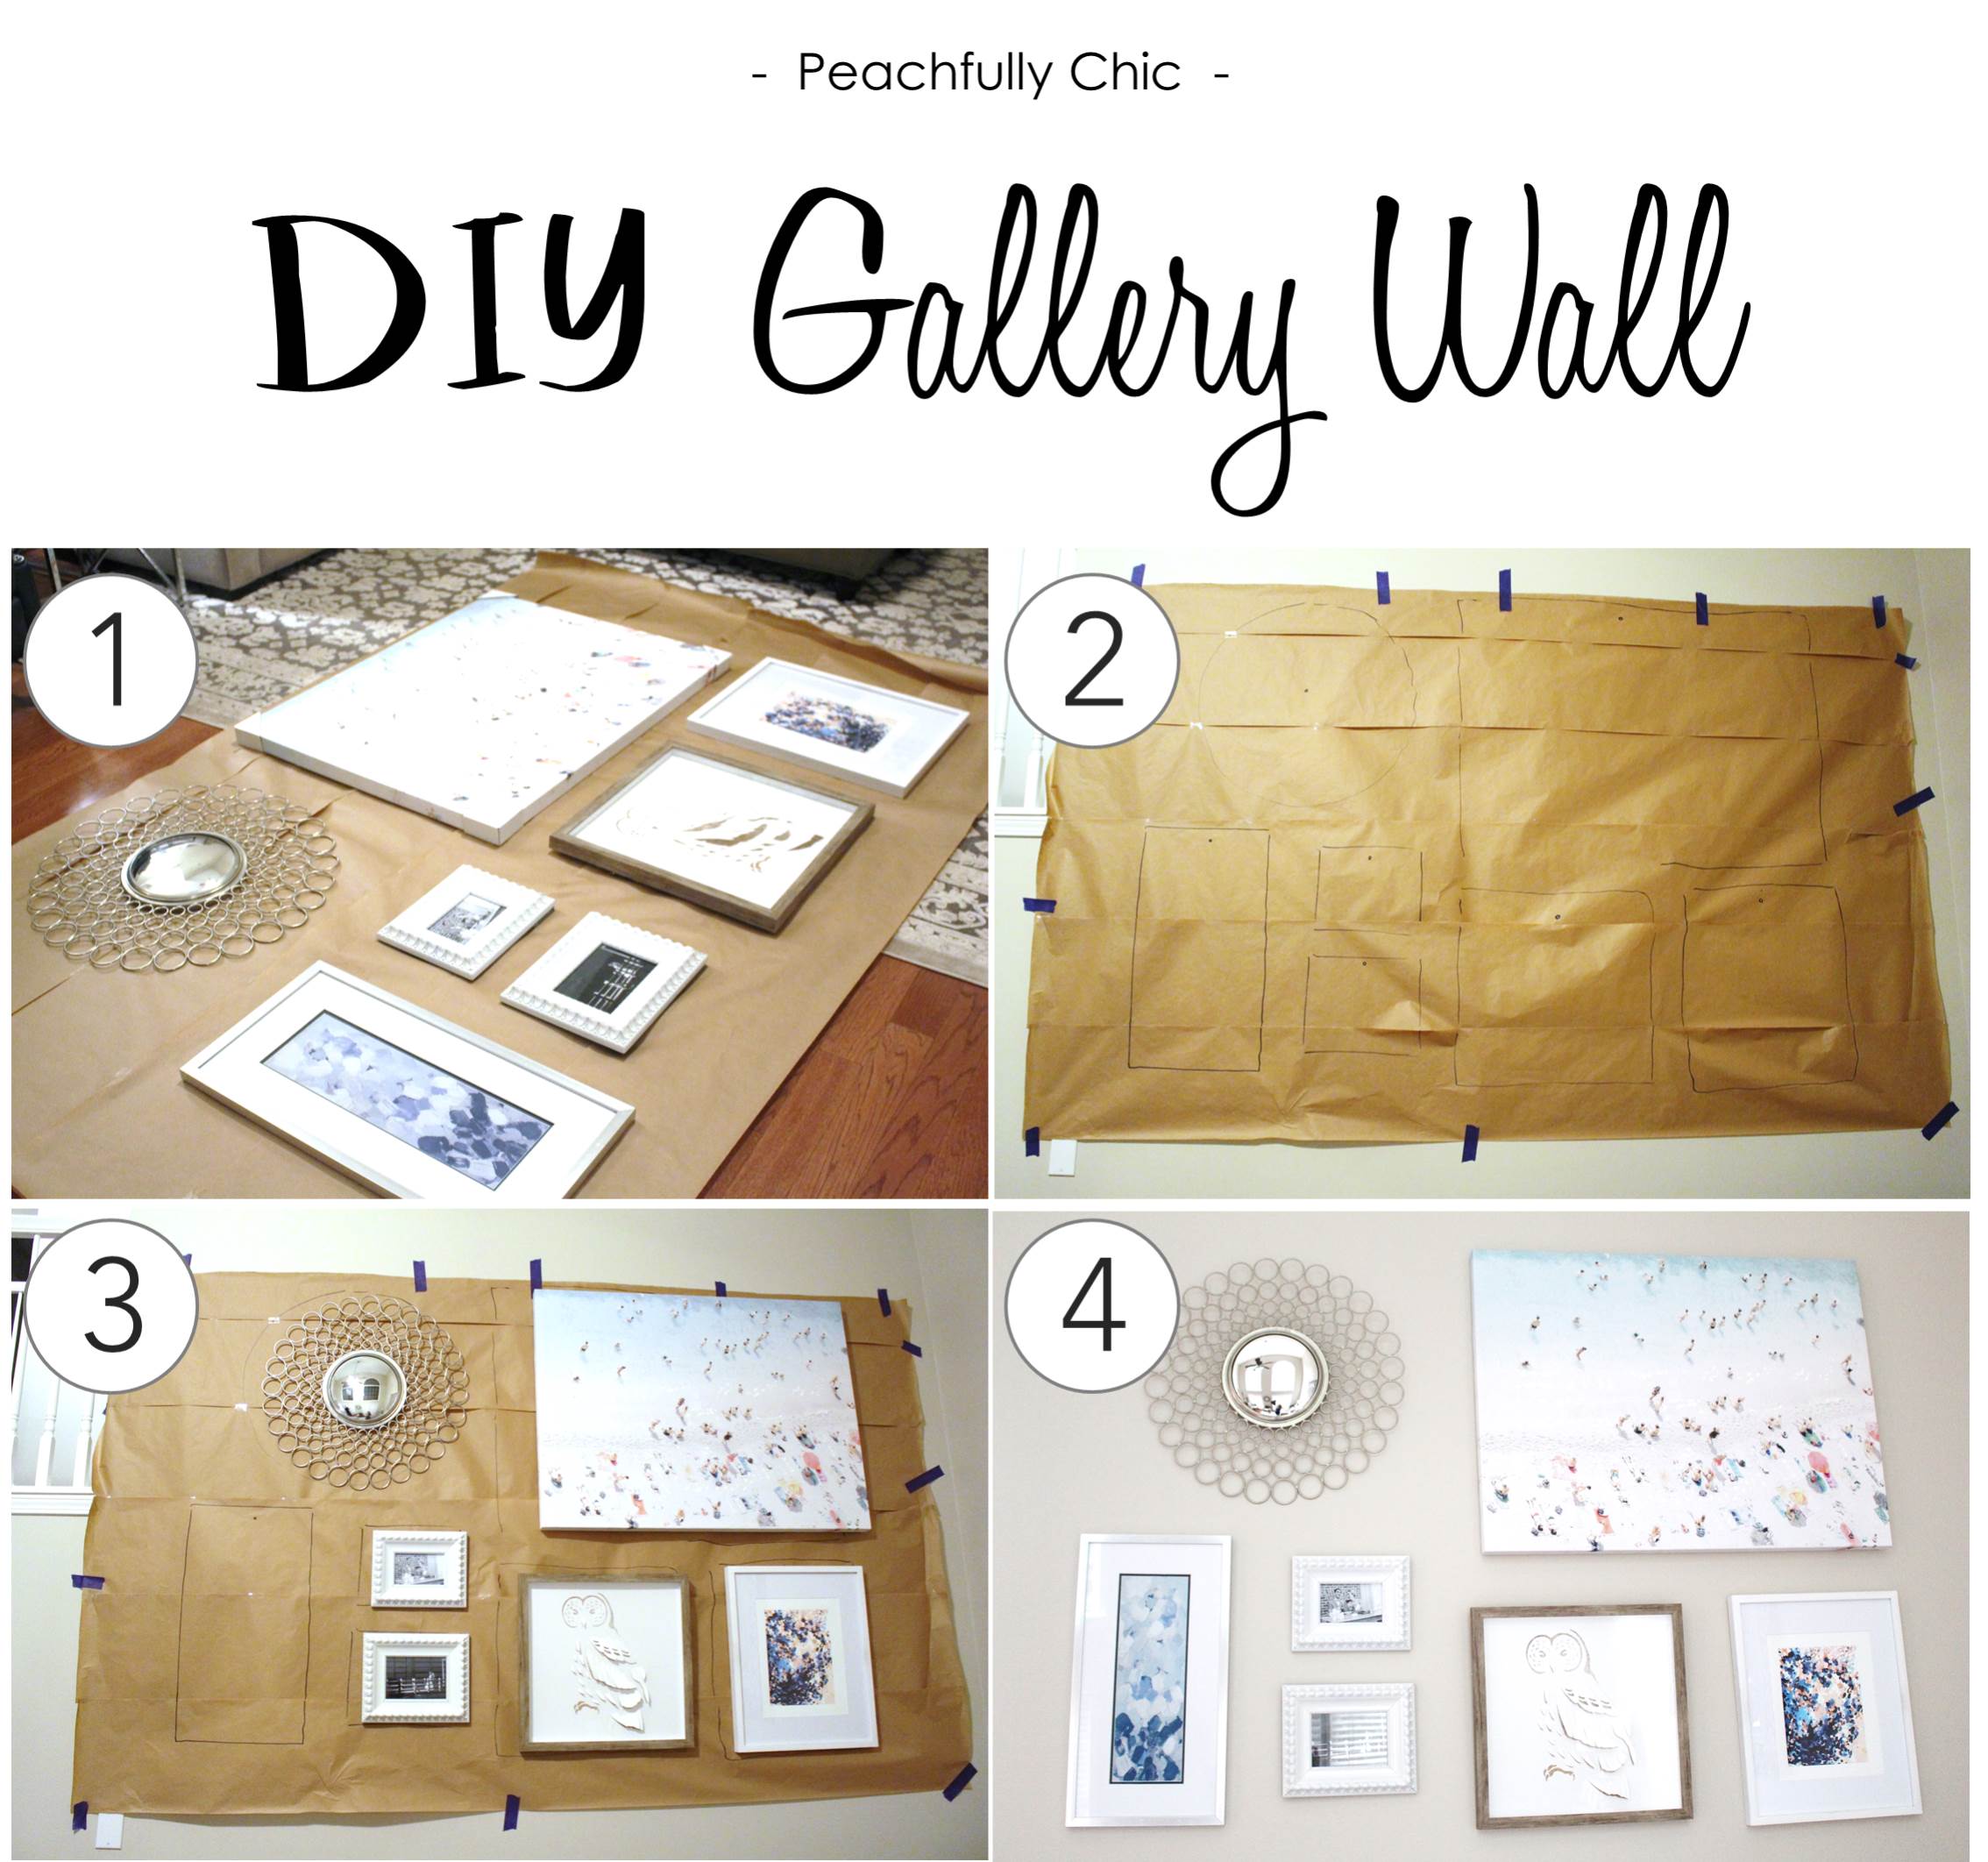
- Measure your wall height & width.
- Unroll the appropriate length of wax paper on the floor to match the width of the wall. Cut a second length to match and tape these two pieces together along the long side.
- Continue this process until you build the rows to match the height of the wall.
- Lay out and position your Gallery Art on the wax paper wall template you made on the floor.
- Trace your Gallery Art on the wall template using your marker. Be sure to not mark your art with the marker. Make sure you mark dots for where you will drill the screws into the wall.
- Using painter’s tape, attach the wax paper template to the wall.
- Drill your holes through the wax paper.
- After all screws have been added, you can remove the wax paper and hang your Gallery Wall or art.
- Sit back, relax, and enjoy the warm environment you’ve created!
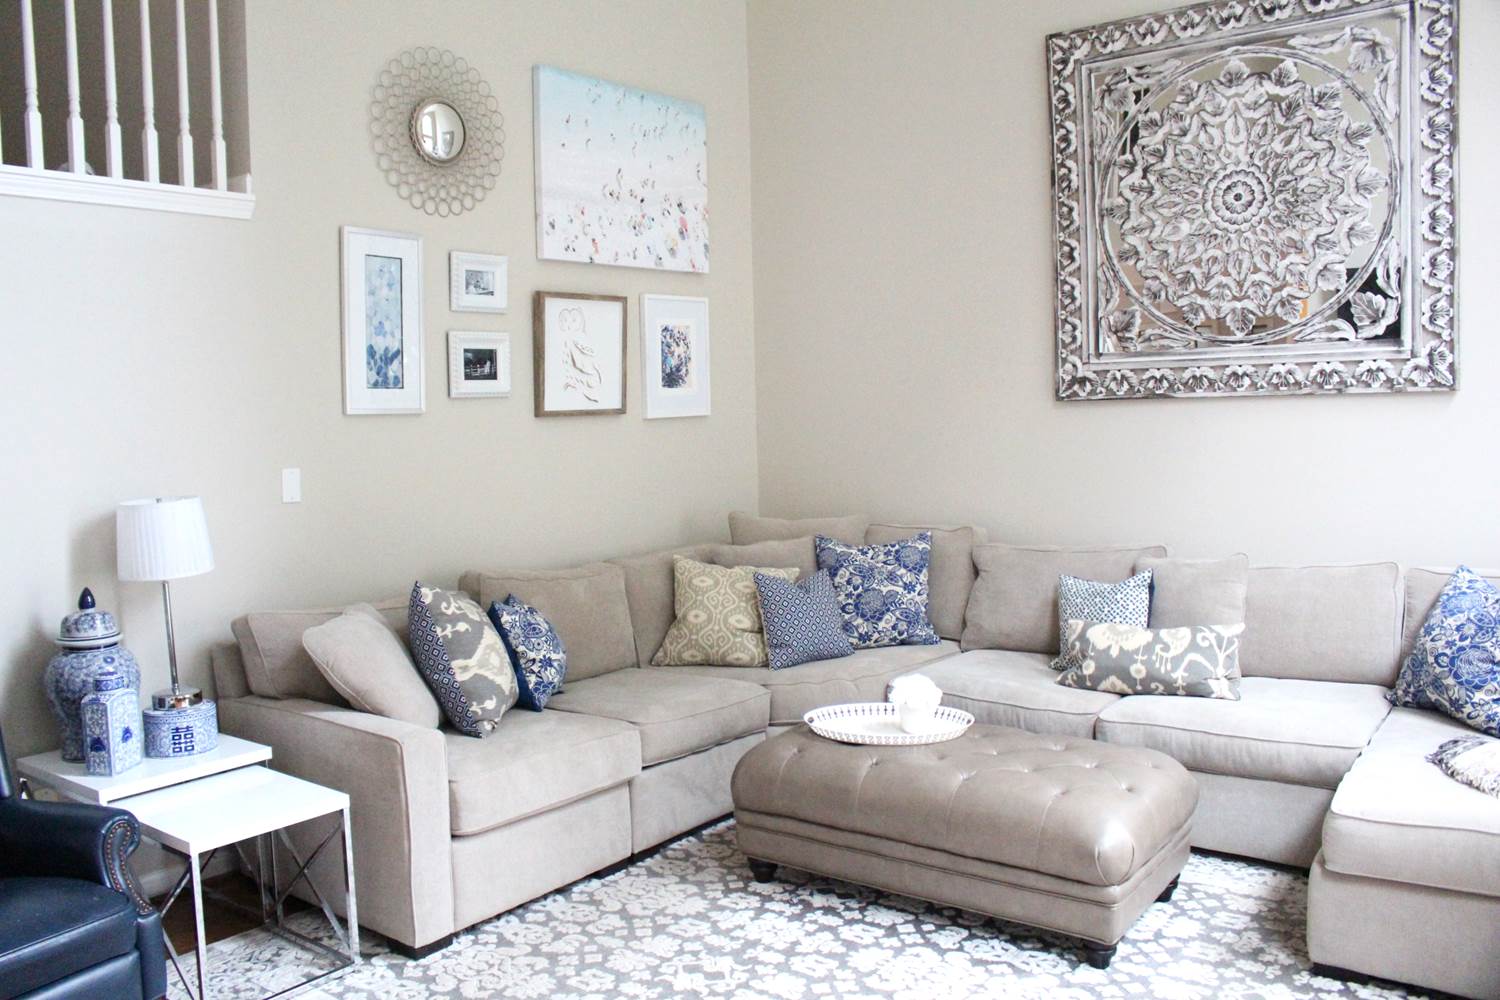
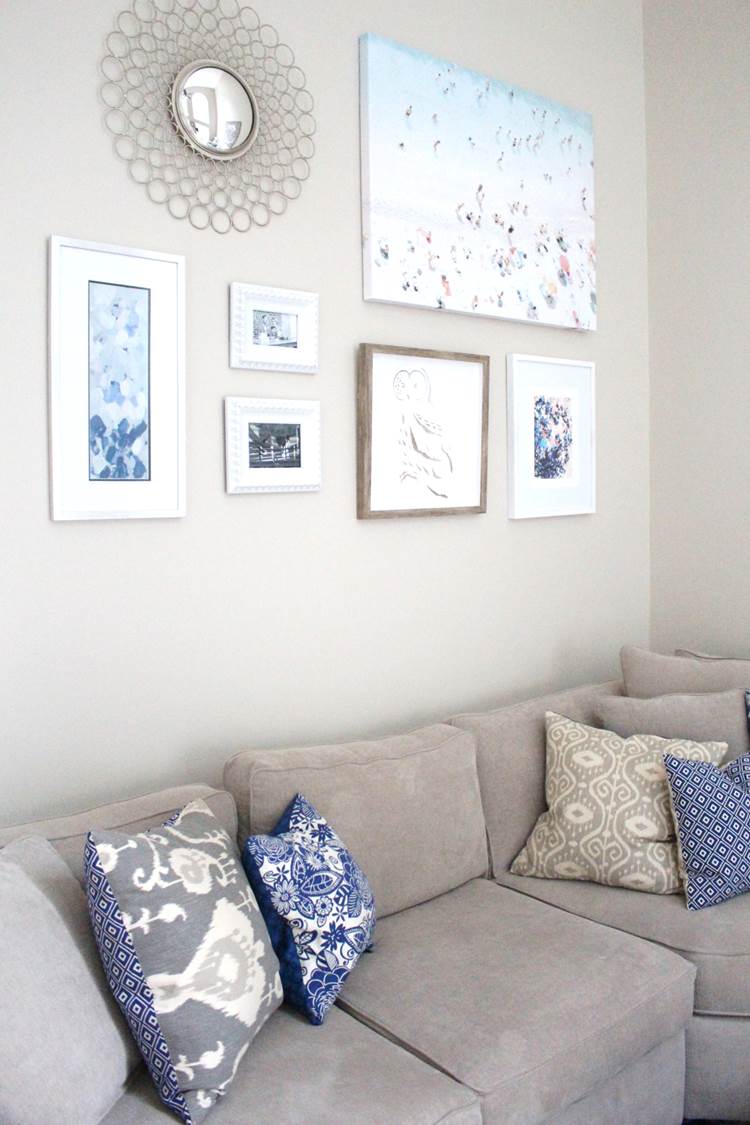
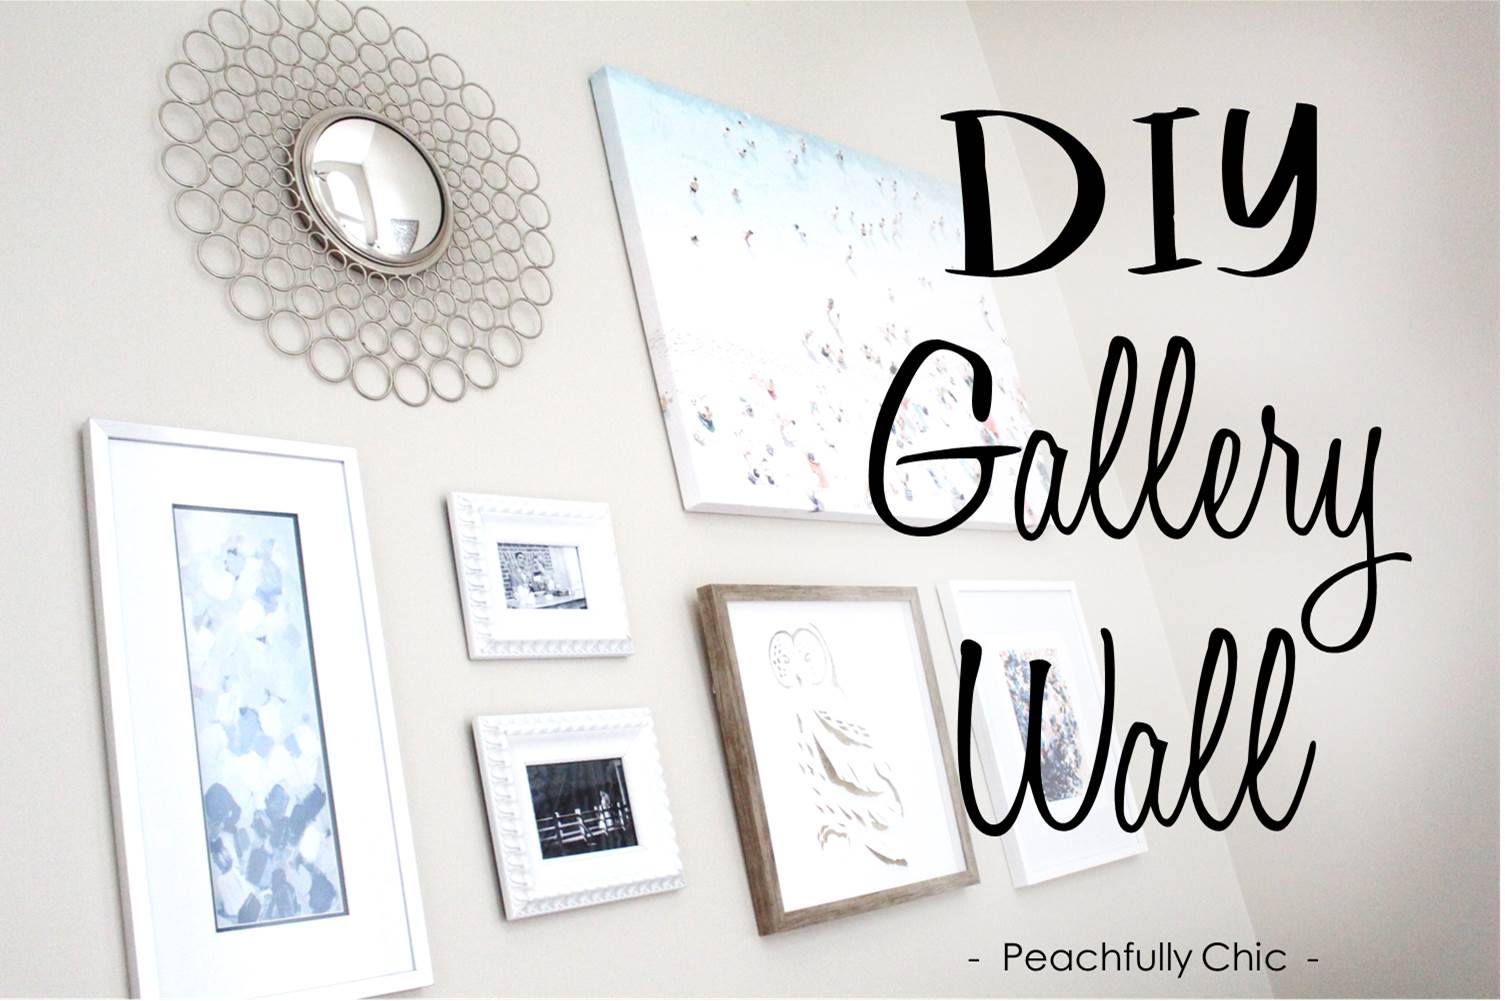
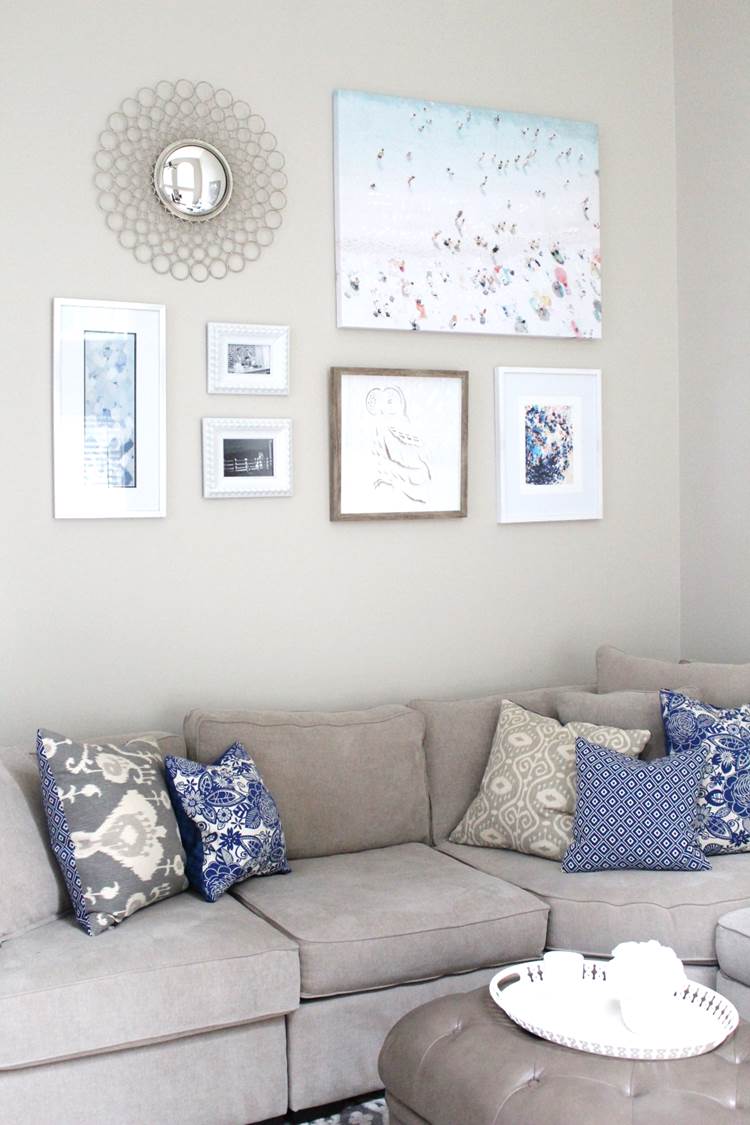
When you finish, you should have a beautiful gouping of art dressing up those bare walls! In our case, the new DIY Gallery Wall helped to instantly transform our living room into a welcoming, relaxing and homey environment.
While I wanted to pull in a gallery wall that would complement the blue throw pillows I sewed for our couch, I also knew I wanted to keep the art somewhat neutral so that I wouldn’t have to change it out much if I decided to switch color palettes later down the road. I also wanted to keep a light airy feeling to the room that subtly drew your eye up the wall, so I decided to stick with a white base for most of the pieces.
I found most of the art at Homegoods: Mirror (similar), Owl (similar), & Light Blue abstract art. The Aerial Canvas Image by Judith Gigliotti (similiar) was from Cost Plus World Market (one of my favorite stores of all time for all things home). I love Gray Malin art, but I spent a fraction of the price shopping around for this beautiful alternative. I can now say I’m a huge fan of both extremely talented photographers!
The small abstract art piece was provided c/o Art Crate. They curate custom art prints and send them to you based on a personality survey. It’s actually a cool way to have some really great art sent to you, but without you having to spend hours/days/weeks on your own looking for something that you like. The artist’s print that I receieved was Katie Keyworth, and it was a perfect fit. I actually included Art Crate in my Holiday 2015 Gift Guide, but it took me a little time to decide where to display Katie’s piece until now!
If you’re curious, the two smaller framed pieces are actually black and white photos from our wedding reception, and I just spray painted white some old frames I had around the house to keep the light white theme.
While I love blue, I dont’ think you have to be exactly matchy matchy in everything you decorate with, nor do I think you should. By pulling in different shades of blue and gray and natural wood, our living room has a relaxing cool vibe that softens the stark white accents that I also love.
After seeing how big of a difference this made our living room look, I wondered why did I wait so long to do this!?!? And now my next question is which room should I take a step back from and start to tackle next!? Don’t forget to stop by again soon to find out!
If you have any great Gallery Wall or Home Decor tips, please share them below! I’m always excited to hear from you on what types of designing and DIY advice you have 🙂

Great job Allison looks amazing!
Thank you Joan!!! 🙂 We are definitely enjoying it!