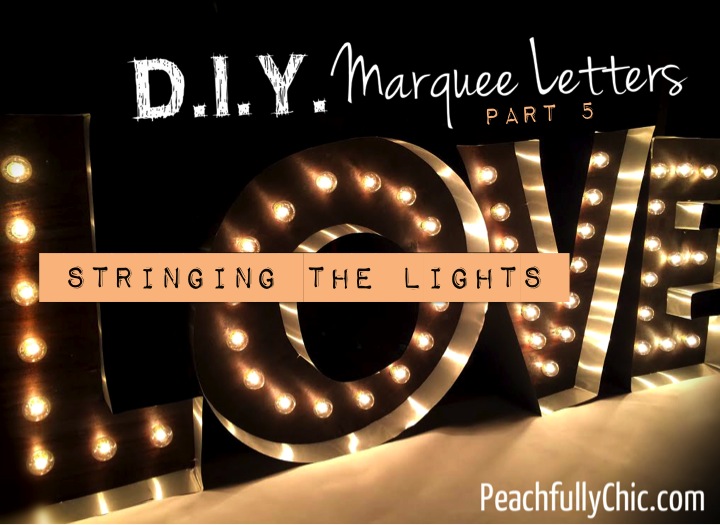
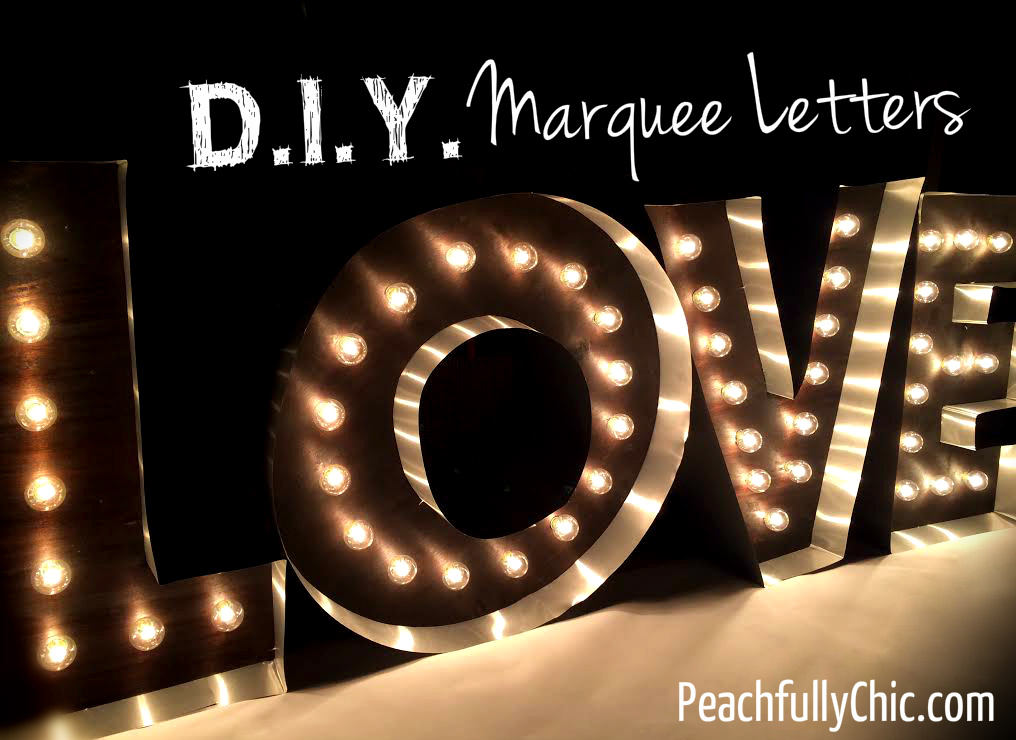
Marquee Love Letters – STRINGING THE LIGHTS:
It’s finally time to wrap this thing up! After breaking down the build of our DIY Marquee Love Letters into 5 different and digestible parts, we finally reach the end of the road and it’s time to string the lights! But before we do, here’s a list of each of the parts of this build that have lead us to this point just in case you missed it:
- Part 1 of 5 (Supplies)
- Part 2 of 5 (Cutting the Letters)
- Part 3 of 5 (Painting the Letters)
- Part 4 of 5 (Adding the Border)
- Part 5 of 5 (Stringing the Lights)
By the time we got to this step, Kevin and I both felt pretty proud that we reached this point (along with all fingers intact!)… we just couldn’t wait to add the bulbs and light this baby up! So without further ado, here are the final set of instructions to complete these DIY Marquee Letters!


Instructions:
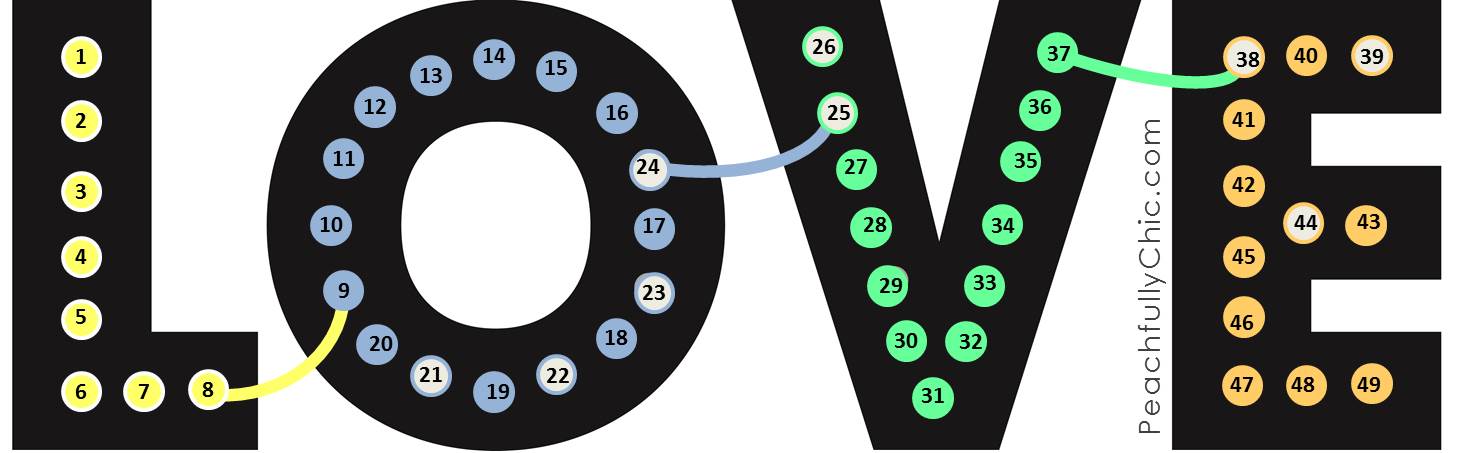
Step 1: Divide the Letters
If you bought the same strand of outdoor lights that we talked about purchasing in part 1 with our list of supplies, then you’ll have exactly enough bulbs on the first strand to fill in all the holes of the “L” and the “O” with 1 bulb leftover to connect to the “V” later.
The other strand will cover the “V” and the “E”, so put that aside for now with those letters and let’s focus on the “L” and “O” first.
Step 2: Start with the Female End of the Light Strand
Since we are focusing on the “L” and the “O” first… We started at the top of the “L” using the end with the female plug. Since you are starting at the top of the “L” you will not be using this end to plug into the electrical outlet because you won’t have enough slack to reach. This first step is important because you need to make sure you have the correct plug for the electrical outlet at the end of the “E”.

For a better idea, this was the layout that we followed (Strand 1 = #’s 1-25) & (Strand 2 = #’s 26-49):
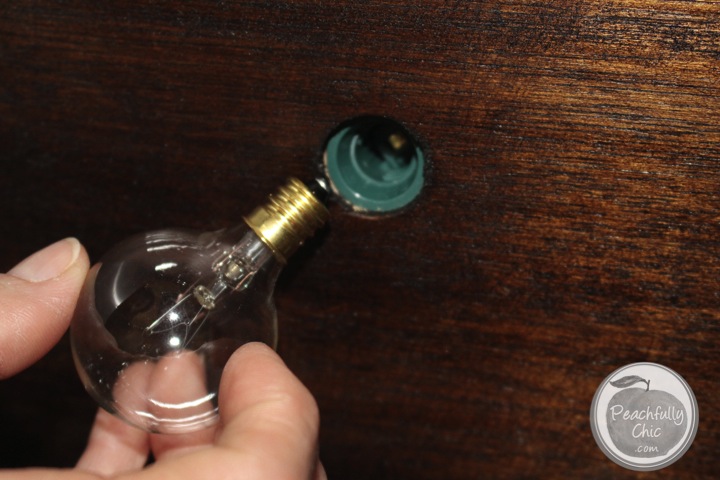
Step 4: Inserting the Light Bulbs
All you need to do is unscrew the light bulb from the base:
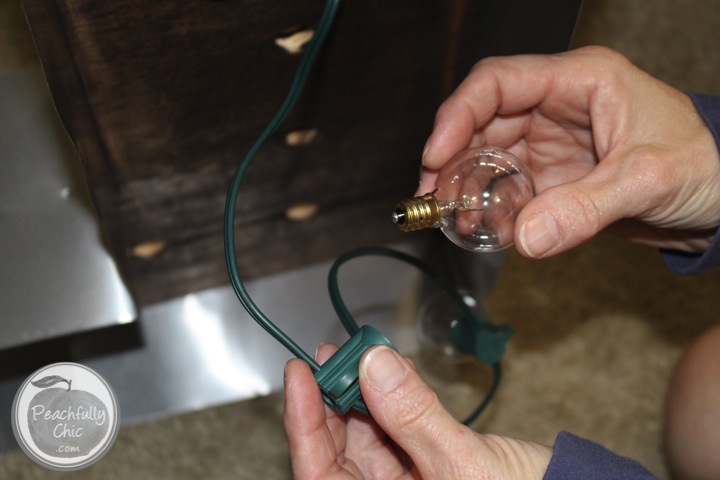
Then insert the base into the hole in the back of the letter:
 This is a view from the front of the letter. You can see the bulb base is poking through the hole from the back.
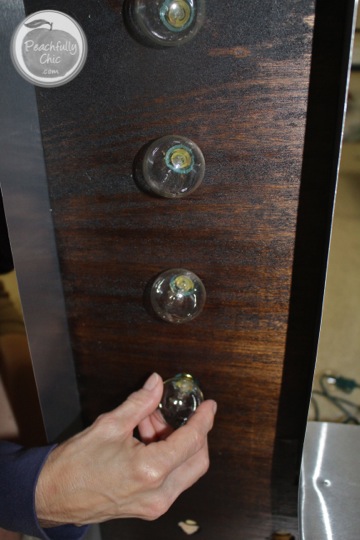
Screw the bulb back into place on the front side and tighten. We had one bulb leftover at the end of the “E” so we just tucked it into the back and then plugged in the lights.
[disclaim]P.S.: TRAVEL: Because Kevin and I live in Atlanta, but our wedding was in Mount Pleasant, SC, we had to make sure that we could pack these babies up and carry them on a roadtrip with all our other wedding decorations. We assembled everything in Atlanta, but waited to connect the “O” and “V” with that random bulb from strand 1 until we were on site (number 25 from the layout above). That allowed us to pack the “L” & “O” together and the “V” & “E” together in another friend’s car. An alternative would be to wait until you arrive on site to insert all the lights at once, but we were too excited to wait until the wedding so this was our solution! We just had to pack carefully to make sure none of the bulbs got squished/broken in transit!. [/disclaim]
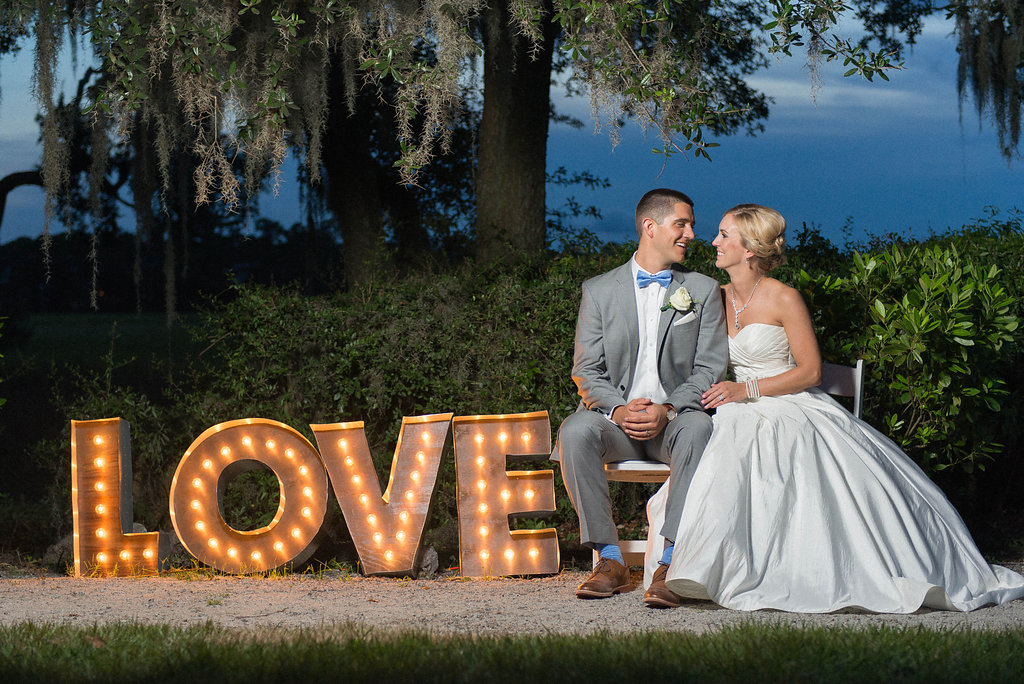
We. Finally. Finished. Phew!
Yippee!!

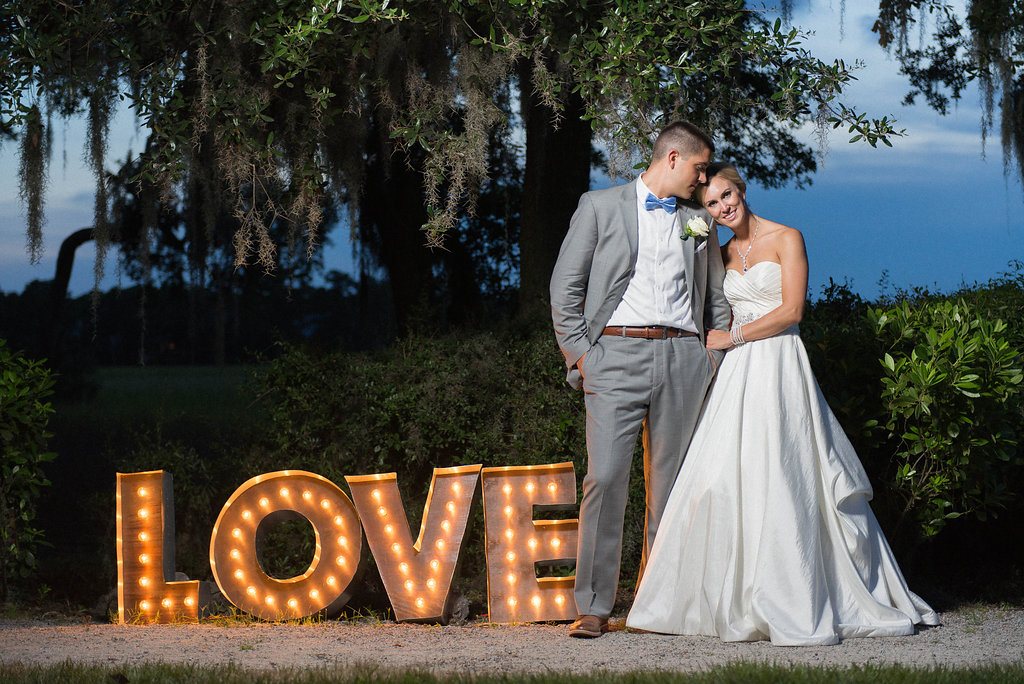
After all of that hard work we were truly thrilled with the results. I couldn’t tell you how happy we were to have created such a cool little sign to include in the backdrop of our wedding. Thankfully I have a great husband, who is more than willing to help out with any of these crazy DIY projects I scheme up! Now to just figure out where we’ll be putting these in our new house!!!
I tried to be as detailed as possible for each step, but feel free to ask questions and I’ll fill you in on any details I may have missed! Let me know if anything is confusing and I’ll try my best to clarify. We broke this build out into a few days with a couple hours here and there whenever we had spare time… but the juice was definitely worth the squeeze in this case!!! 😉

DIY Marquee Love Letters ♦ How-To Instructions:
Part 2 of 5 (Cutting the Letters)
Part 3 of 5 (Painting the Letters)
Part 4 of 5 (Adding the Border)
Part 5 of 5 (Stringing the Lights)

LOVE this. What a fun and pretty DIY. you’re so creative.
Thanks Melissa! It was my first (of many) build it out type projects where I needed to actually use something other than a sander, so it was a lot of fun to try this!
I have been wondering how to make these for so long! I am definitely going to attempt this soon! Thanks so much!
Fun! Let me know how it goes for you and feel free to reach out if you have any questions as you make them!
Hi Allison, I just finished cutting out the letters from the 1/2 inch thick plywood. We drilled the holes using a 13/16 spade drill bit. I have a problem now though. I can’t seem to slot the lightbulb holder into the slot; the side clip of the lightbulb holder is preventing me from slotting it into the hole.
If I were to leave the lightbulb holder flushed to the surface of the wood, the lightbulb’s screw is too short to reach the lightbulb holder (as the wood’s 1/2 inch thick)
How did you manage to insert the bulb into the holder and through the wood? Do you have any pictures of how you insert it?
Hi WK – Sounds like you are almost finished but I’m sorry you are running into problems inserting the bulbs… The side clip on the lightbulb holder does prevent the base from sliding very far in the hole but it should come through flush. Our lightbulb base was flush on the front surface (see 2nd image below “Step 4” in the post above for reference) but our bulbs screwed in without problems. I’m wondering if a different bulb set could have a different screw length. Our bulb set is an old model from 2 years ago from Target – which brand are you using? Do you know the length of the screw on the lightbulb?
Hi Allison,
I’m wondering about the font? The photo you posted of the printout looks different from the image you posted of the template. The holes in the letters appear to be open on the printout but closed on the template. I hope this makes sense.
Also, did you use photoshop for the template?
It is the “Budmo Font” that I used to just create a template in powerpoint actually 🙂 When I saved it as an image in the correct size, I just saved the template on a jump drive and sent my husband to Staples to print it in the correct size. I think it might have just been how Staples printed it out on their end.
But the holes will be drilled later so it’s less about the hole template being filled in or not, and more about making sure you have the right size drill bit size. As long as you have a font that gives you evenly spaced holes along the font, that’s the most important. Hope this helps! I’m happy to jump on a call if you have more questions or to clarify further 🙂